نرمافزار MasterCam یکی از قدیمی ترین نرمافزارهای تهیه مسیر ماشین کاری جهت دستگاه های CNC میباشد که ساخت شرکت CNC Software Inc است. این نرمافزار جهت نصب و استفاده نیاز به الزامات سختافزاری کمتری نسبت به نرمافزارهای مشابه دارد و با داشتن post processor قوی امکان تعیین انواع مسیرهای حرکت ابزار جهت فرز و تراش CNC را فراهم می نماید...
محصولات مرتبط
نرمافزار MasterCam یکی از قدیمی ترین نرمافزارهای تهیه مسیر ماشین کاری جهت دستگاه های CNC میباشد که ساخت شرکت CNC Software Inc است. این نرمافزار جهت نصب و استفاده نیاز به الزامات سختافزاری کمتری نسبت به نرمافزارهای مشابه دارد و با داشتن post processor قوی امکان تعیین انواع مسیرهای حرکت ابزار جهت فرز و تراش CNC را فراهم می نماید. MasterCam در واقع یک نرمافزار مدل سازی کامل است که wireframe geometry دوبعدی وسه بعدی و عملیات سطح را با ویرایش قدرتمند و ابزار تغییر شکل ترکیب میکند. MasterCam Mill که براساس MasterCam Design پایه ریزی شده است این امکان را به شما میدهد که تعداد عملیاتهای ماشین کاری مختلف و گسترده را ایجاد و مدیریت کنید. MasterCam بخشی به نام associativity برای پیوند دادن عملیاتهای ماشین کاری به هندسه به کار میگیرد. بنابراین وقتی هندسه قطعه تغییر میکند Tool Paths میتوانند به طور اتوماتیک احیا شوند.
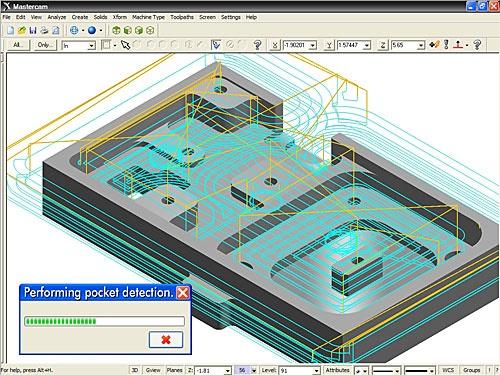
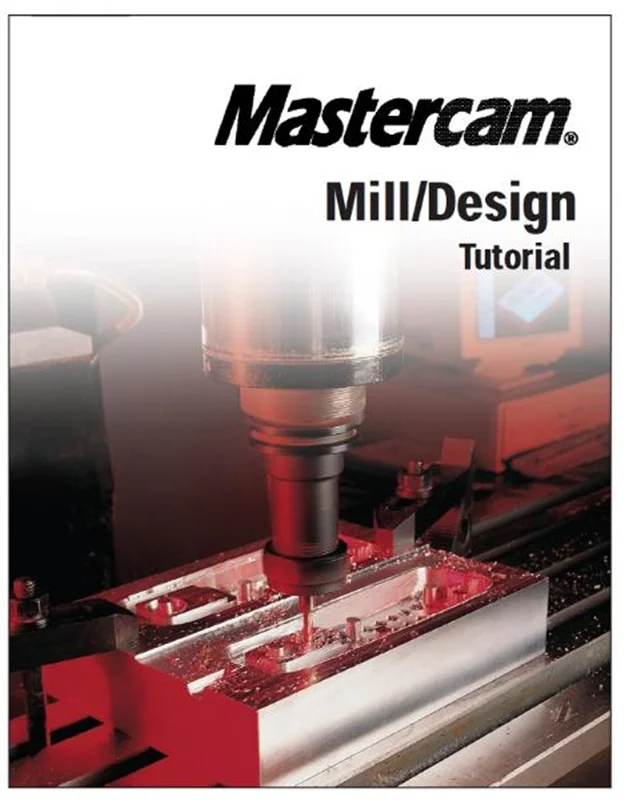
طراحی پروسه ماشینکاری و استخراج G code دستگاه فرز در MasterCam مشتمل بر 446 صفحه، در 19 فصل، به زبان انگلیسی روان و به همراه تصاویر رنگی هر دستور و نوار ابزارها، به ترتیب زیر گردآوری شده است:
Chapter 1: Introduction to Mastercam
- Using the sample parts
- If you need more help
- Additional resources
Chapter 2: Getting Started
- Exercise 1 – Learning the Mastercam interface
- Exercise 2 – Designing a rectangle
- Exercise 3 – Deleting the rectangle and using help
Chapter 3: Creating a 2D Part and Contour Toolpath
- Exercise 1 – Designing the part
- Exercise 2 – Creating the contour toolpath
- Exercise 3 – Making changes to the toolpath
Chapter 4: Copying and Transforming Operations
- Exercise 1 – Creating roughing and finishing passes
- Exercise 2 – Creating a contour chamfer
- Exercise 3 – Mirroring the part and toolpath
Chapter 5: Rotating Geometry and Toolpaths
- Exercise 1 – Creating the geometry
- Exercise 2 – Cutting the slots
- Exercise 3 – Rotating a toolpath
Chapter 6: Creating Drill Toolpaths
- Exercise 1 – Creating a basic drill toolpath
- Exercise 2 – Changing the size of a drill hole
- Exercise 3 – Drilling at different Z depths
Chapter 7: Working in 3D
- Exercise 1 – Creating 3D geometry
- Exercise 2 – Drawing the bottom of the part
- Exercise 3 – Creating a drill toolpath in the new system view
Chapter 8: Using Circle Toolpaths
- Exercise 1 – Creating a custom view
- Exercise 2 – Machining the outside contour
- Exercise 3 – Machining the holes and slot
- Exercise 4 – Using Auto drill to create multiple drilling operations
Chapter 9: Facing and Pocketing Toolpaths
- Exercise 1 – Facing the stock with high-speed loops
- Exercise 2 – Comparing different pocket cutting methods
- Exercise 3 – Specifying an entry point
- Exercise 4 – Using contour ramp
Chapter 10: Pocket and Contour Toolpath Techniques
- Exercise 1 – Remachining pockets
- Exercise 2 – Using depth cuts, island facing, and tapered walls
- Exercise 3 – Modifying a toolpath using the Toolpath Editor
Chapter 11: Reusing Operations
- Exercise 1 – Creating an operations library
- Exercise 2 – Importing operations
- Exercise 3 – Using subprograms
Chapter 12: Choosing a Surface Type
- Draft
- Ruled
- Loft
- Revolved
- Swept
- Coons
- Fillet
- Trim, To surfaces
- Trim, Flat boundary
- Offset
- Surface Blend
- Fillet Blend
Chapter 13: Creating and Machining Surfaces
- Exercise 1 – Creating surfaces
- Exercise 2 – Creating a rough parallel toolpath
- Exercise 3 – Creating a finish parallel toolpath
- Exercise 4 – Creating a finish leftover toolpath
- Exercise 5 – Creating a finish pencil toolpath
Chapter 14: Surface Roughing
- Exercise 1 – Creating a rough pocket toolpath
- Exercise 2 – Creating a rough plunge toolpath
- Exercise 3 – Creating a restmill toolpath
- Exercise 4 – Creating a high speed pocket toolpath
Chapter 15: Surface Finishing
- Exercise 1 – Using finish steep and shallow toolpaths
- Exercise 2 – Creating a finish radial toolpath
- Exercise 3 – Creating a finish project toolpath
- Exercise 4 – Creating a finish contour toolpath
- Exercise 5 – Creating a contour shallow toolpath
- Exercise 6 – Creating a finish scallop toolpath
- Exercise 7 – Creating a finish flowline toolpath
Chapter 16: Creating Multiaxis Toolpaths
- Exercise 1 – Creating a curve 5-axis toolpath
- Exercise 2 – Creating a swarf 5-axis toolpath
Chapter 17: Machining Solids
- Exercise 1 – Machining the pocket
- Exercise 2 – Drilling the holes
Chapter 18: Glossary
Chapter 19: Mastercam Shortcut Keys

جهت خرید آموزش طراحی پروسه ماشینکاری و استخراج G code دستگاه فرز در MasterCam به مبلغ فقط 20000 تومان و دانلود آن بر لینک افزودن به سبد خرید در پنجره بالا کلیک نمایید.
!!لطفا قبل از خرید از فرشگاه اینترنتی برتر فایل قیمت محصولات ما را با سایر محصولات مشابه و فروشگاه ها مقایسه نمایید!!


 فقط پیامک (09010609492)

دیدگاه خود را بنویسید